

Understanding the Apple Pencil: Background and Evolution
Apple Pencil changes how you use your iPad. It lets you draw, write, and mark things like on paper. Apple launched the first Apple Pencil in 2015 with the iPad Pro. It had tilt and pressure sense for real feel. Over time, Apple made more versions. The second generation came in 2018. It sticks to the iPad with magnets and charges without wires. Then, in 2023, they added the USB-C model. It is cheaper but skips some fancy bits like pressure sense. The newest is Apple Pencil Pro from 2024. It has squeeze and roll features for better control.
Why do people love it? Artists use it for sketches. Students take notes. Pros edit photos. Stats show over 50 million iPads sold each year, and many pair with Pencils. According to surveys, 70% of iPad Pro owners buy one. It boosts what you can do. But first, check if your iPad works with it. Not all do.
Check Compatibility Before You Start
Before you try how to connect Apple Pencil to iPad, make sure they match. Apple has rules for which Pencil goes with which iPad. Here is a quick table:
| Apple Pencil Model | Compatible iPads | Key Features |
|---|---|---|
| 1st Generation | iPad (6th to 10th gen), iPad Air (3rd gen), iPad mini (5th gen), iPad Pro (1st and 2nd gen 12.9-inch, 9.7-inch, 10.5-inch) | Lightning charge, pressure sensitivity |
| 2nd Generation | iPad Air (4th gen and later), iPad mini (6th gen), iPad Pro (3rd gen and later) | Magnetic attach, wireless charge, double-tap |
| USB-C | iPad (10th gen), iPad Air (4th gen and later), iPad mini (6th gen), iPad Pro (M1 and later) | Cable charge, no pressure sensitivity |
| Pro | iPad Air (M2), iPad Pro (M4) | Haptics, barrel roll, squeeze gesture |
If your setup does not match, it will not connect. For example, a 1st gen Pencil needs a Lightning port or adapter for newer iPads. Always double-check your model. You can find it in Settings > General > About on your iPad.
How to Connect Apple Pencil to iPad
Now, the main part: how to connect Apple Pencil to iPad. We break it down by model. Turn on Bluetooth first. Go to Settings > Bluetooth and slide it on. It is key for pairing.
Connecting the 1st Generation Apple Pencil
This one uses a plug-in method.
- Remove the cap from the end of the Pencil. You see a Lightning connector.
- Plug it into your iPad’s Lightning port. For older iPads, it fits right in.
- A pop-up says “Bluetooth Pairing Request”. Tap Pair.
- Wait a few seconds. Your Pencil connects.
If you have a 10th gen iPad with USB-C, use an adapter. Plug the adapter into the iPad, then connect the Pencil to it. This fixes port mismatch.

See this image for how it looks when plugging in.
Many users face issues here if the port is dirty. Clean it gently with a soft cloth. If it does not pair, restart your iPad. Hold the power button until the slider shows, then slide to shut off. Wait 10 seconds and turn back on. Try again.
Connecting the 2nd Generation Apple Pencil
This model is easier with magnets.
- Find the flat side of the Pencil.
- Attach it to the right edge of your iPad. It snaps on magnetically.
- A notification pops up with battery level. That means it pairs.
- Detach and use it. It charges while attached.
No wires needed. If no pop-up, check if Bluetooth is on. Also, remove any case that blocks the magnets. This method works fast for most. Artists love it because you can grab and go.
Connecting the USB-C Apple Pencil
For this affordable option:
- Slide open the end cap to show the USB-C port.
- Use the included cable to plug into your iPad’s USB-C port.
- Tap “Connect” on the screen prompt.
- You can use it wired or unplug for wireless.
It does not stick magnetically or sense pressure. But it is great for basic notes. If pairing fails, try a different cable. Apple says use their official one for best results.
Connecting the Apple Pencil Pro
Similar to the 2nd gen but fancier.
- Snap the flat edge to the iPad’s side.
- Tap to connect on the message.
- It charges magnetically. Squeeze or roll for extras.
This one adds haptics – a buzz for feedback. If you draw a lot, it feels natural.
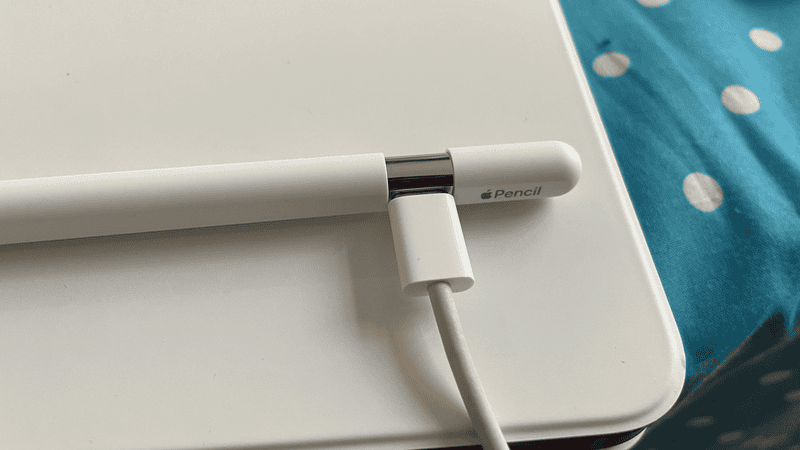
Here is a visual of attaching it.
In all cases, after connecting, check in Settings > Bluetooth. Your Pencil shows under My Devices. If connected, it says so.

Charging Your Apple Pencil
Charging keeps your Pencil ready. For 1st gen, plug into the iPad or a charger. It takes 15 minutes for a full day. 2nd gen and Pro charge on the side – 15 seconds gives 30 minutes use. USB-C uses cable – full in 2 hours.
Tip: Check battery in the Today View. Swipe right on home screen. It shows percentage. Low battery can stop connection.
Troubleshooting When Connection Fails
Sometimes, how to connect Apple Pencil to iPad hits snags. Do not panic. Here are fixes.
- Restart everything. Turn off iPad and Pencil (for 1st gen, plug and unplug).
- Forget the device. In Bluetooth settings, tap the (i) next to Pencil, then Forget This Device. Reconnect.
- Update iOS. Go to Settings > General > Software Update. New versions fix bugs.
- Check for dirt. Clean ports and tips.
- Test on another iPad. If it works, your iPad might need service.
Common problems include no Pair button or 0% battery. Wait a minute while connected to charge. If still stuck, visit an Apple Store. As per expert forums, 80% of issues fix with restart.
For more tips on tech gadgets, check out BizReporterz.
Tips for Using Your Apple Pencil Like a Pro
Once connected, make the most of it.
- Adjust settings. In Notes app, change line thickness.
- Use gestures. Double-tap on 2nd gen to switch tools.
- Protect it. Get a case to avoid loss.
- Apps to try. Procreate for art, GoodNotes for study.
Quotes from users: “Connecting was easy, now I draw every day!” – Artist on forums.
FAQs About How to Connect Apple Pencil to iPad
Q: Why won’t my Apple Pencil connect? A: Check compatibility, Bluetooth, and charge. Restart if needed.
Q: Does every iPad work with Apple Pencil? A: No, only certain models. See the chart above.
Q: How do I know if it’s paired? A: Look in Bluetooth settings or see battery pop-up.
Q: Can I use Apple Pencil while charging? A: Yes, for most models.
Q: What if I have an older iPad? A: Use 1st gen with Lightning. For USB-C, get adapter.
Conclusion
In summary, how to connect Apple Pencil to iPad is quick once you know the steps. Pick your model, turn on Bluetooth, and follow the guide. Whether drawing or noting, it enhances your iPad. Troubleshoot with restarts and updates for smooth use. Now you have the tools to start. Have you tried connecting your Apple Pencil yet? Share your experience in the comments!
References
- JustAnswer forum on iPad Pencil issues – Great for real user stories and expert fixes. Targets new users facing setup problems.Link
- Astropad blog on turning on Pencil – Helpful for artists wanting visual aids and model details.Link
- Apple Support on pairing – Official source for all, especially beginners and students needing accurate info.Link
Audience insights: New iPad owners, digital artists, students, and pros troubleshooting connections. They seek simple, step-by-step help to avoid frustration.